mash-up blog hop
11.29.2012
Welcome to our first Heidi Swapp Mash-Up Blog Hop!
The definition of a Mash-Up (according to the Urban Dictionary) is, "v. To take elements of two or more pre-existing pieces of music and combine them to make a new song. n. A song comprised of elements of two or more..."
A Heidi Swapp Mash-Up is taking elements from two or more collections and to combine them to make something fabulous! We have asked each media team member to name two Heidi Swapp products and compile a Mash-Up List. Then, each team member took the full list and used that (and more!) to create their first Mash-Up project!
Here is the Mash-Up List:
At least 1 Day Glow Photo Corner
Sentiment Stickers
Color Magic Paper
Note Card (either Vintage Chic or Color Magic Notes)
Buzz Words
Color Magic Chipboard Alphas
At least 2 Pattern Papers from Different Heidi Swapp Collections
Neon Glow Tape
Staple
Handwriting - either your own or Heidi's digital words
Here is my little take on the project...
I chose to do a traditional layout but with several twists.
Can you find my mash up products?
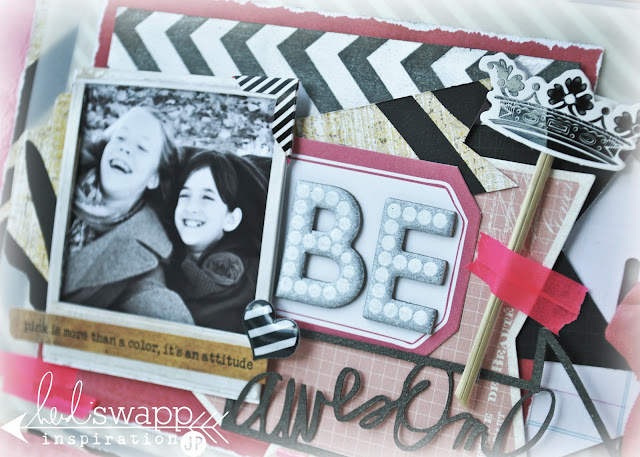
The DayGlow photo corner is a used on the upper right corner of the MiniInstaFrame.
The Sentiment Sticker was used to celebrate the glory of pink.
A strip of the chevron ColorMagic paper was used as a layering piece.
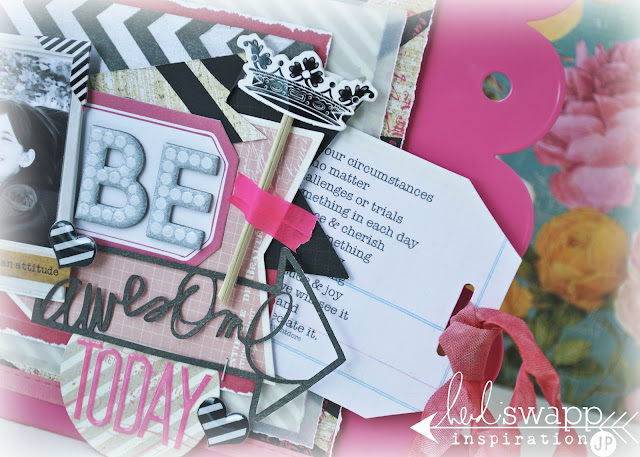
Two of the VintageChic Notes were used: one as a layer, and another was used as a little surprise interactive piece. (Details to come...hang on).
I used hearts from the Black&White BuzzWords. Since I had a lot of words already on this project, I did not want to muddle it with another word, so I opted for a heart embellishment instead.
Used the ChipboardAlphas with Tinsel ColorShine to spell the "BE".
The two patterns included SugarChic Drama and the VintageChic Textbook diagonal side.
The DayGlow tape is front and center.
And I used mini staples to attach the DigiWord "awesome' that I also welded to an arrow.
A couple of things makes this layout a little different than most.
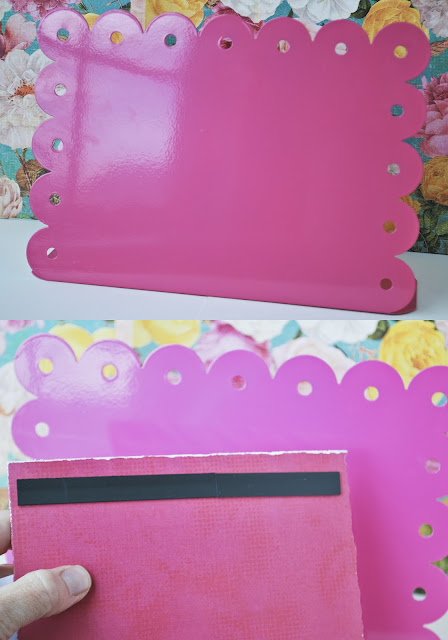
First, I started off with a metal scalloped desk top stand in pink that I found at my local craft store. It is perfect to go in my daughter's newly decorated room of grey, pink, and animal print. I knew when I found this it would be a great piece to have in her room to switch layouts in and out of. Notice the magnet strips on the back of my layout? This let's the papers and photo 'stick' to her stand yet we can always change it when the mood hits. Thinking I will be doing this for some Christmas presents this year.
Another little surprise is the photo. I sewed a tab to the picture that fits into the Mini InstaFrame, and we can take that out and replace with another if we wanna. Don't you love choices?
And my last little surprise is that a VintageChic Note is tucked into the layers in a pocket I created while adding patterned paper and embellishments. I added a quote to this tag to remind my daughter of the need to be awesome everyday...and how to go about that.
What a fun project! I love how it all came together and how it allowed for some fun interactive aspects to add to it's uniqueness.
Now, we want to give you a chance to play along!!! Take our Mash-Up list and let it help you create your next project! You can upload your project to Heidi Swapp's Facebook Fan Page with a link to your project online or Instagram it by adding @heidiswapp and the hash tag #HSMashUp ! Those that play along will be entered to win this Vintage Chic Collection! One random winner will be picked by Monday, December 3, 2012.
Now, to see more Mash-Up inspiration from the media team, click over to see Lindsay, Jennifer, Kim, and Maggie's blogs!
december daily 2012
11.27.2012
So it's that time of year again...
So very hard to believe Christmas is simply around the corner...yet again...
This brings me to the part where I start to prepare our family's DecemberDaily journal.
As I went to gather albums from past year's I realized that this will be my sixth year to create this mini.
I was astounded by that fact.
Six years!
And then...I started to look at them, from the first to the last...
and the first one simply had me in tears.
I was so pleased that I had captured and wrote what I did in that very simple first book.
Capturing the nuances of our everyday...
plus the traditions that follow us year after year that make us a family.
I was beyond thrilled once again that this is a project I commit to year after year.
It's not an easy project to stay on top of...
but nothing worth while is easy...
Today I wanted to kick off the series with the cover of this years' book.
This album sticks to a 6x8 format. Even though my books are different from year to year, I like keeping with the same size in general.
The foundation of design for our 2012 book begins with the MyMindsEye Lost&Found3Ruby. The grey really pulled me in, as well as the traditional red.
Here is how it went::
1. covered 6x8 chipboard with grey and cream polka dot. The left edge is lined with a contrasting striped design, then the red striped was cut in an opposing direction for an added pop on top. I was going to make this an interactive piece, but since this album is handled so much, I thought it better to keep the cover a bit of a minimum...as much as I am able, that is.
Lots of my current stash is working it's way into this book. After deciding on the initial colors and patterns, I went and 'shopped' my own stash to finish the cover. The rest of what you see here is from product already in my supplies::
2. Washi tape from MyMindsEye All Is Bright was added to the ruby stripe. A frame cut from FollowYourHeart was popped up with a grey pattern from StudioCalico underneath. The frame was wrapped with baker's twine. I added a DiscoStar from HeidiSwapp to the frame as well as a '25' that is from the PinkPaislee PortfolioAlphabetStickers. The 'december' is a Cameo cut from HeidiSwapp's Digital Words: Months.
I love the contrast of patterns, the pop up of texture, as well as the color that is festive yet soothing.
I will be back next week to share some inside pages.
Hoping you too find the experience of a DecemberDaily a true treasure to your Christmas. These are books that tell simple, everyday stories. And I know, as I look back through them over the years, I will be ever so grateful to have taken this time to record, document, and photograph that which makes our everyday life a gift.
Now go...find a way that fits you to document your Christmas celebration.
christmas tag contest
11.21.2012
Hello friends...
such a fun and exciting time of year.
while it can be overwhelming...it can also be a time of creative pursuits and celebration.
i hope as you enter the time of Thanksgiving your hearts will be at rest as the Christmas season starts, literally, the next day.
One of my all time favorite styles of Christmas can be seen in Rhonna's Christmas Junque line of digital goodness.
It is a timeless in my book.
AND...
and...
she just this week added several kits to compliment Junque, but with a modern flair.
and I love them!!!
and these are just a few of the ChristmasJunque collection...and here is a peek at the newest::
Rhonna just announced a very fun contest on her blog yesterday...
and i have to admit...she had me at 'tag'...
tags are such perfect columns of creativity waiting to happen...
having always been a fan of the tag...
i had to have a little go at it myself.
I used all new MerryChristmaskits released this week.
I used of course the Cameo for the scallop and pinked circle.
I used ColorShine dyed seam binding...
I used glitter...
Will you play along?

food and family traditions
11.20.2012
Today I am posting over on HeidiSwapp's blog and am sharing our family's traditional fare of Pumpkin Scones we share on Thanksgiving morning. Hope you will hop over and check out all those details.
But today let's get a little digi with it and talk about creating with digital elements. Digital papers and frames and elements add so much versatility to our creative endeavors. From making cards, to hybrid projects to even the traditional layout. I do not 'scrap' digitally, but I am always creating in some way digitally and am a bit addicted. As I made a little layout for my post over at Heidi's, I wanted to show you how it came together. All elements are from Heidi's Digital Shop. My current software of choice is PhotoshopElements. Brushes can be used in pse, as well as layering. So that is what we are going to do today.
1. Open up a new canvas in your photo software and size it to 6x5 inches. Now open a digital background paper and drop it on top of the 6x5 canvas. (I am using a digital paper that is no longer available in Heidi's shop, but you can use any background you desire.)
This is what you should have so far::
2.Open up your image of choice. Then open up a frame from the Vintage Insta Frames. I used frame number 4. Drag the photo on top of the Insta Frame. Using the move tool, situate the photo so it fits in the frame. Then in your layers palette, move the frame so that it sits on top of the photo.
This is what it will look like in layers::
And this is what your framed photo should look like::
3. Open the SugarChicNoteCards and click on the Remember Card. Drag this on top of the first 6x5 canvas::
4. Now it's time to pretend that it is a flat piece of traditional patterned paper and start playing.
Click on the framed photo and command+shift+e. This will flatten the photo and the frame. Drag and drop photo to the top of above canvas. Use move tool to resize, tilt, and place on top of the canvas::
5. Open the 'little' and the 'heaven' from the Gratitude Brush kit. Change the color by choosing Edit>Fill Layer>and choose which Color preferred. Use the Move tool to drag and drop the words where desired on the canvas. By clicking the square corners that surround the word, you can change the size to what you prefer::
6. Still with me???...
Now click on the text tool. Choose your text. ( I used TravelingTypewriter...on of my favorites.) Click down on the canvas. Add your extra words. Use the Move tool to place them where needed::
7. Lastly drag a LabelSticker and a sentiment/rubon from the ColorfulInstaframes and drag and drop them in place::
8. And that is basically a simple little digital layout ala HeidSwapp Digital products.
One last touch I like to add to my digital projects is a bit of a white vignette on the edges. Flatten the image in Layers first. Click on the Rectangle Marquee tool. Draw a frame just inside the parameters of the canvas.
Click on Select>Feather. Mine is set to 50, click OK. Click Select>Inverse. Then go to Edit>Fill Layer> and select white. Then just click outside the canvas and the image will be deselected. This will add just a touch of soft white around the edges if you wish::
If you have any questions, please let me know. I am mostly self taught here, but I will be happy to help you.
And have a Happy Thanksgiving.
desktop mini file album
11.19.2012
So if you follow me at all on this blog you may suspect I have a thing for mini albums.
The idea of one smallish album being home to a single story really gets the creative juices flowin' for me.
Don't get me wrong, I am still a traditionalist when it comes to the 12x12...one of those die-hards that does not believe traditional scrap booking is dead...but that is another post for another time.
So when Heidi introduced in her MemoryFilesLive class a new use for the ChipboardMemoryFiles I immediately fell in love.
There is also a CreateToRemember video that shows off how this is put together.
Of course mine went slightly different...because that is how I roll...couldn't just do it like all the rest.
No, instead I trimmed the bottom of one of the shaped mini chipboard files so that I could use the shaped one and it still sit on the desktop as it is suppose to.
What really makes this such a fun project for me is that it is a display piece.
Hence the desktop part...right.
The right side of the file is sort of a bulletin board if you will.
Notice I used an everyday office supply clip to hold the photo of mr. pate and I.
These pictures in this display came from a sort of photo expedition our family enjoyed on our last Sunday up in GlenwoodSprings. (You may recall last weeks TravelMemoryFile home to 40 photos...well yep...you guessed it...there are even more photos.)
So what a great event to have out for display.
I treated the right side 'bulletin board' just like any other layout. Lots of layers of paper, words, chipboard embellishments, wood veneers, tags...just what I do already, only a little bit more miniature.
The left side of the 'album' is a photo stack I made with NoLimits pattern paper.
It is a great way to still get a whole lot of photos in one place. There are thirteen pictures in the photo stack with the dimensions of either 3x3 or 3.5x2.5.
A peak into how those are all arranged inside the stack.
Gosh I love the diversity of paper arts and story telling these days.
There are so many ways to show off those precious memories.
This desktop mini file could be really simple...
or embellished to the hilt...
and still be such a show piece.
This one sits right next to the TravelMemoryAlbum and tells a complete story that my family reaches for very often.
Love how this keeps the memories alive.
Love how it keeps us connected.
Love how we remember these special times in our lives.
Now go...check out Heidi's video for this project.
because not only is this a great project for yourself...
but I know that I am going to be making several for Christmas as well.
travel memory file
11.16.2012
wow...
been a busy week around here...
finished up Heidi's MemoryLive webshows earlier this week...
not only are those classes chock full of insight and inspiration...
but the chatting that goes on is so much fun...
for that alone it is totally worth being apart of the festivies next go around.
hope you don't miss it.
before class started, i finished up my travel memory file for our september weekend away to GlenwoodSprings.
and what I adore about this album made from the MemoryFile concept...
is that I have 40 photos in here...
yep...
sure do.
40.
do you know how much this busy mom loves that?
aLoT.
so here are some details for you...
this project starts out with a NoLimits Memory File. I think those are perfect for a travel theme.
Right on the front of that file is one of the MiniMemoryFiles .
As you open that sweet page up it is home to five photos plus room for journaling.
The embellies are mostly all HeidiSwapp with a bit of my stash thrown in here and there.
The graph paper is actually a PostIt Note. I love them for journal spots.
After the NoLimitsMemoryFile is opened up, photos are laid out everywhere, plus another MiniMemoryFile...
I really adore how the soft patterns from the MiniFiles work so well with the bold patterns from the NoLimitsMemoryFile. Imagine that?
So then when the MiniMemoryFile is opened up...there is a self made photo stock full of photos and journaling too.
I kept the embellishments inside the file fairly minimal. There were so many photos I wanted to be sure to include as many of those as I could and keep the emphasis on the story.
Last page...but attached to it is a FotostackOpenable which can be a home to soooo many more photos and story telling.
So that is how I have 40 photos in these sweet files.
I love it so much. I really do. I love the file concept. It works for me so well. You know me...I love mini albums...but there is a certain diversity to the files that is filling my creative bucket these days.
It is so accesible sitting on an easle ready for anyone to pick up and enjoy.
so now go....
create lots of memories and make 'em pretty.
grateful inspiration jars
11.13.2012
Today over on Rhonna's blog she has a new edition of CreativeTeamTuesday.
Melissa is showing off adorable and inspiring glitter houses...
oh the things you can do with chipboard and glitter!!!
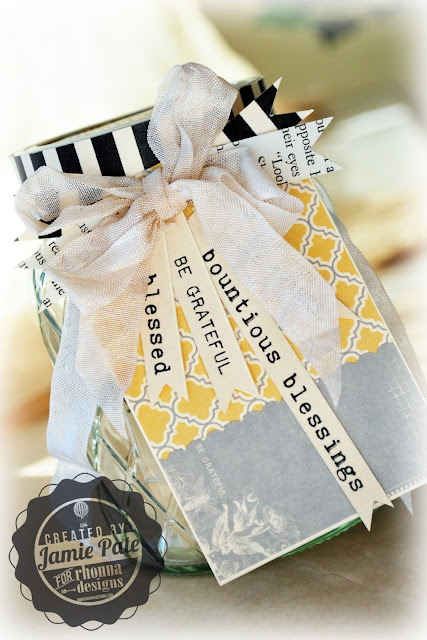
And I took the GratefulGlam kit + InstaQuotes kit...
and came up with what I call an Inspiration Jar.
An easy gift-able that I will have trouble actually giving away.
GratefulGlam is a kit Rhonna created last year for this season of giving and thanksgiving.
But it is timeless!!!
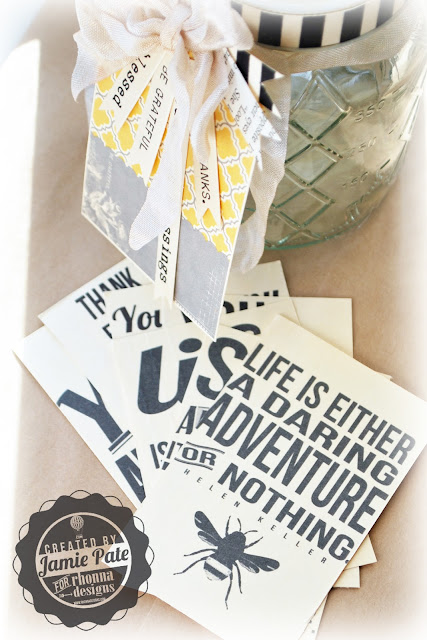
I adore how the CardsNTags print out on manila...
Did the same with the Tags N Flags kit...
if you know me...i love sentiments and words...
I have used the TagsNFlags kit over and over again.
It's just one of those kits you need in your arsenal.
Used patterns from the SpookyPrintablePapers to dress up the top of the jar.
The quatrefoil print was printed on vintage dictionary paper.
The stripe on more manila folder stash.
See...I don't pretty much ever throw too much away...
I save all my manila folders and re-use them in some way...
love it.
The InstaQuotes were also printed on the manila stock.
A few InstaIcons were added here and there.
Made this one for a special friends bday...
but think I will be making more.
So now go...
create something inspiring for someone special in your life...
and be sure to make one for you too.
Thank you so much for stopping by.
grateful heart vignette
11.12.2012
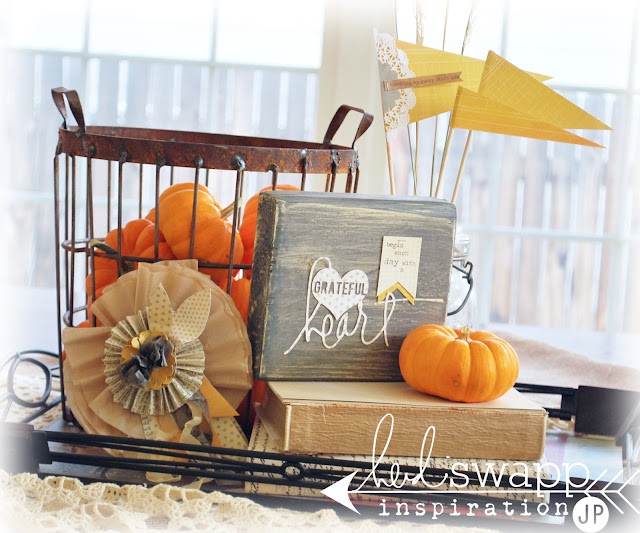
I always dress up my dining room table. It is the first thing I see when I walk downstairs of a morning, and it is important to me that my table is fashioned in a pretty way. So this space is usually dressed up seasonally, with a bouquet of flowers, or simply with an easel and my most favorite recent layout. Whatever my current mood, the center piece has to show off what I am feeling.
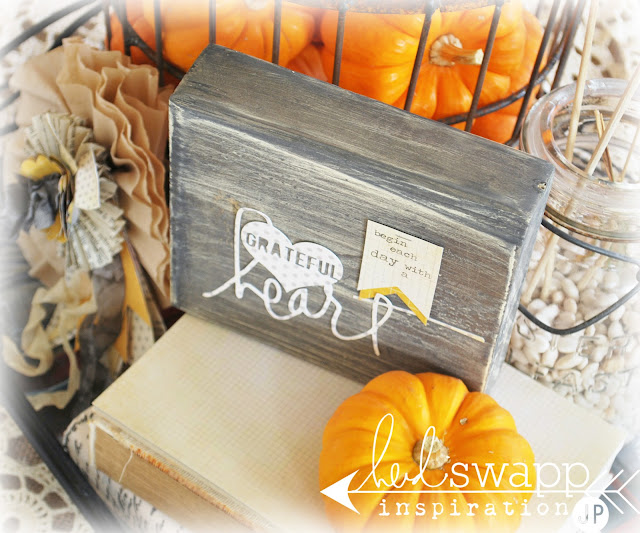
An assignment for HeidiSwapp was to show off a little what goes on in my home this time of year. There are a lot more details today on her site...and I hope you will go check it out.
A couple of things I want to reiterate...
Decorating does not have to be expensive. Nothing tickles me more than using traditional paper products to make custom embellishments for my home. I have done it for years, and continue to be inspired by the challenge.
Taking every day items, like coffee filters, vintage books, pumpkins from the grocery or a neighbor can take every day normal into something pretty. And I like pretty.
Thank you readers for visiting me. For leaving encouraging comments. For being faithful. You, to me, are some of my lucky stars.
Subscribe to:
Posts (Atom)


