how to create a pre-made album

6.22.2015

How to create a pre-made pocket album for a wedding shower. Make room for photos or journaling. @jamiepate
Hello! I just finished a pre-made album I am excited to share with you. The album is part of my stash that was waiting to be used for the perfect project. The ProjectLife Cards are available at Michaels. I used the Gold Foil kit as well as the 6x8 Memory Planner Paper pack. They were just made to go together.

How to create a pre-made pocket album for a wedding shower. Make room for photos or journaling. @jamiepate

This album, like most all my mini albums, begins with a cover page. The Bazzill Clear Paper (not available right now) was used to be the intro to this album for a bride to be.


How to create a pre-made pocket album for a wedding shower. Make room for photos or journaling. @jamiepate


The die cut is from the Wanderlust Collection. Cut out with American Craft white cardstock and then sprayed gold with my favorite Rustoleum Metallic Gold. The heart is from Pink Paislee's Solstice Collection. Oh...and that texture paste...new from Heidi Swapp. Found at Michaels along with the rest of the Mixed Media set.

How to create a pre-made pocket album for a wedding shower. Make room for photos or journaling. @jamiepate
When I am creating a gift album for someone else, I am thinking about keeping it very do-able for them. I want it to be a place where they can simply slip in an Instagram photo in any of the pockets, or journal on a card whatever is on their mind.

How to create a pre-made pocket album for a wedding shower. Make room for photos or journaling. @jamiepate
For this to work a few things have to be part of the mix: colors should be kept to just a few different hues. The embellishments need to stay uncomplicated. And the pages need to follow a pattern, or a sketch if you will.

How to create a pre-made pocket album for a wedding shower. Make room for photos or journaling. @jamiepate
This album does just that. The colors are mainly three: soft pink, soft teal, pops of gold foil, and that is all pulled together with touches of black and white.

How to create a pre-made pocket album for a wedding shower. Make room for photos or journaling. @jamiepate
The embellishments found here will be hearts, gold as well as paper punches, some Art Screen phrases, and then little tags on the edge of almost every page.

How to create a pre-made pocket album for a wedding shower. Make room for photos or journaling. @jamiepate
This page is a good example of the first two elements: the colors are all represented here. There is a touch of gold foil; a simple embellishment found with the 'mr. & mrs.' . art screen;  and a white and black polka dot flag.

How to create a pre-made pocket album for a wedding shower. Make room for photos or journaling. @jamiepate
Here is the pattern or page sketch that I followed for this gift album: the first page is a 4x3 pocket page with 4 pockets. 

How to create a pre-made pocket album for a wedding shower. Make room for photos or journaling. @jamiepate
Remember to make pretty the back side of the pockets too.

How to create a pre-made pocket album for a wedding shower. Make room for photos or journaling. @jamiepate
The next page protector includes 2-4x6 pockets. 

How to create a pre-made pocket album for a wedding shower. Make room for photos or journaling. @jamiepate
And then the last page in this pattern is an 8x6-inch page. This page is actually more of a traditional scrapbook page. 

How to create a pre-made pocket album for a wedding shower. Make room for photos or journaling. @jamiepate

After that, the sketch of pages starts all over again.

How to create a pre-made pocket album for a wedding shower. Make room for photos or journaling. @jamiepate
It takes some planning to get this to work in the direction I wanted it to work. But once I was started, once I had that color, embellishment and sketch plan in mind, I just went to the creative play of it all and had a blast putting this together for the bride to be.

How to create a pre-made pocket album for a wedding shower. Make room for photos or journaling. @jamiepate
Next time you are needing a heartfelt and handmade gift...
How to create a pre-made pocket album for a wedding shower. Make room for photos or journaling. @jamiepate
Gather all the supplies you need which includes color, embellishment and a sketch.

How to create a pre-made pocket album for a wedding shower. Make room for photos or journaling. @jamiepate
And then...

How to create a pre-made pocket album for a wedding shower. Make room for photos or journaling. @jamiepate
...enjoy the process.

I would love to know what works for you when you create gift albums. And if you have one out there, I would love to see it. Please tag me on Instagram @jamiepate.

Blessings my friends...will be sharing more pocket ideas next week with you.

Bye...

texture paste cards

6.17.2015

New Heidi Swapp Texture Paste and Stencils. Two ways to create mixed media cards with texture paste and art screens. @jamiepate @heidiswapp
Hello everyone...
Who knew when I was playing with these cards and the new Heidi Swapp Texture Paste (found at Michaels) that she would publish her new My Craft Channel video on just that...texture paste! Seriously...I never know what her videos will be about until I view them on Wednesday mornings.

New Heidi Swapp Texture Paste and Stencils. Two ways to create mixed media cards with texture paste and art screens. @jamiepate @heidiswapp
But I just so happened to need some thank you cards and wanted to play with the new Mixed Media set that is now out there (and selling out I might add).


I used the Insta-Words Stencil Minis to come up with about four card designs. Two I will share with you here.


New Heidi Swapp Texture Paste and Stencils. Two ways to create mixed media cards with texture paste and art screens. @jamiepate @heidiswapp

The Teal Metallic Texture Paste is a lovely color. Using a 4x4-inch piece of watercolor paper, I applied the paste over the Happy stencil. As it dries the paste becomes this beautiful metallic hue. A 'thankful' sticker from the Boxed Planner kit (no longer available) is my sentiment. Any word/phrase sticker would work here. Along with a Clear Sticker and Foil Tag from the Memory Planner Collection.


New Heidi Swapp Texture Paste and Stencils. Two ways to create mixed media cards with texture paste and art screens. @jamiepate @heidiswapp
Memory Planner Patterned Paper was stenciled with Gold Metallic Art Screen Ink using a screen from the Hello Sunshine Screen Kit.


New Heidi Swapp Texture Paste and Stencils. Two ways to create mixed media cards with texture paste and art screens. @jamiepate @heidiswapp
When making cards, and needing more than one, a variation on a theme is the best way to go. So I worked up the same idea with the 'hello' card. Just changed the little elements as well as the stencil.


New Heidi Swapp Texture Paste and Stencils. Two ways to create mixed media cards with texture paste and art screens. @jamiepate @heidiswapp
And that is how ya put the Mixed Media Collection to beautiful work on a card. 
Now wouldn't you love to receive one of these in the mail?

Thank you for visiting.
Will share the next set of cards on another post!
Blessings!!!

journaling confessions

6.15.2015

This layout I am to share with you today was created for the Pink Paislee blog and is posted here. That particular assignment was called Design Lab. Design Lab is a study in what goes into memory keeping. The elements that bring it all together for a particular scrapbook style. You can read all the details for that focus on the Pink blog.


What I want to point out here today are photos. In that article I talk about how photos are my starting place. I alluded to the fact that THAT point might seem redundant. But I don’t think everyone does indeed start with the photo. But for me, I gather the images of the moment in my mind and a story starts to form. The story of our life.

One thing that came to the surface as a reminder to me while creating that post, was journaling. I did not list that as a design element. And that’s because, by way of confession, I have let that part of the telling fall off. 


Cathy Z recently reminded me of the richness that comes from truly journaling our stories. She takes such beautiful detail in her telling. She struck a nerve in me. I am not doing my story telling justice. I am not really telling the stories well. I am skipping over that for the supposed sake of creativity and am forgetting the very core of why I take the time in the first place.


So here I am today to place a new line in the sand. I am going to be more purposeful and intentional about my telling. And it starts with the layout right here. I will pull this precious memory out again and tell how we just simply were together the morning of Mother’s Day. How the simplicity of being together in these casual ways speaks to my heart. It’s a peaceable way to celebrate a day, and it meant so much to me. The goofiness of my girls and littlest and how they really act together. The making of breakfast by my oldest daughter in our kitchen. The coming together at table like we do every Sunday morning and the richness that that time is. And how my littles kids (not being so little any longer), love to hang and play a game on the iPad and just talk and banter back and forth. All while still in our jammies.

Simple simple little moments found in our home right now.

july 4 marquee star class

6.13.2015


This vignette was posted on HeidiSwapp.com yesterday for a mini series on Marquee Love and July Fourth. Hobby Lobby recently began to carry the Marquee Love making it even more accessible to create with these fabulous diy kits. Maggie Massey, Heidi Media team member, also created a really fun and festive post as well. Be sure and check it out.

This project was so well received. All the excitement ties right into my exciting news to announce a local class to teach this junque star, as well as a few other extra creative goodies. All the details for my Junque Marquee Star Class can be found right >>>HERE<<<.

If you are local I would love love to see you come out for the class. These girls night's out are not only a time for creative learning, but they are always full of laughter and hilarity. One just never knows what will be said out loud. Our motto is quickly becoming, what is said in class, stays in class.

Hope to see you here!

sweet sixteen marque love

6.11.2015

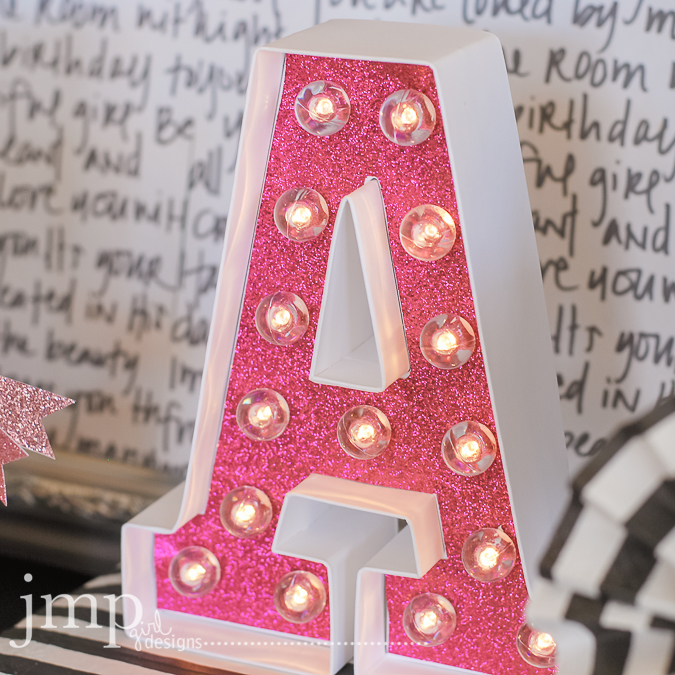
Had so much fun creating this festive Sweet 16 Marquee Love vignette for my daughter's birthday.

Sweet Sixteen Marquee Love | @jamiepate How to celebrate a meaningful birthday and decorate a party Heidi Swapp Marquee Love style
It simply came together like a dream. The Marquee Love letter A was upcycled from a previous celebration (my son's graduation in May).

Sweet Sixteen Marquee Love | @jamiepate How to celebrate a meaningful birthday and decorate a party Heidi Swapp Marquee Love style

As stated before, I just don't glue down the inserted paper. The lights hold it all in place. So when I want to create something new, I pop out the lights and pull up the glitter paper and do something else.  That extra diy aspect really makes these letters quite a value.

Sweet Sixteen Marquee Love | @jamiepate How to celebrate a meaningful birthday and decorate a party Heidi Swapp Marquee Love style
The little easel chalkboard was found at the Dollar Spot at Target. I can't walk into Target without perusing that space first. You just never know what you are going to find there and must have.

Sweet Sixteen Marquee Love | @jamiepate How to celebrate a meaningful birthday and decorate a party Heidi Swapp Marquee Love style

The 'you got this' is from Heidi Swapp's free downloadable printable found here. I printed the image on white cardstock. Then I ran it through the Minc machine with Pink Foil. The image was then punched out in a circle shape. A rosette was created using the napkins from my party supply. The 'you got this' was hot glued to the rosette, then the rosette was hot glued to a lollipop stick, and tah dah! instant mousse embellishment. (p.s...yes...my daughter DID make all her desserts for her party...it's what makes her happy.)

Sweet Sixteen Marquee Love | @jamiepate How to celebrate a meaningful birthday and decorate a party Heidi Swapp Marquee Love style
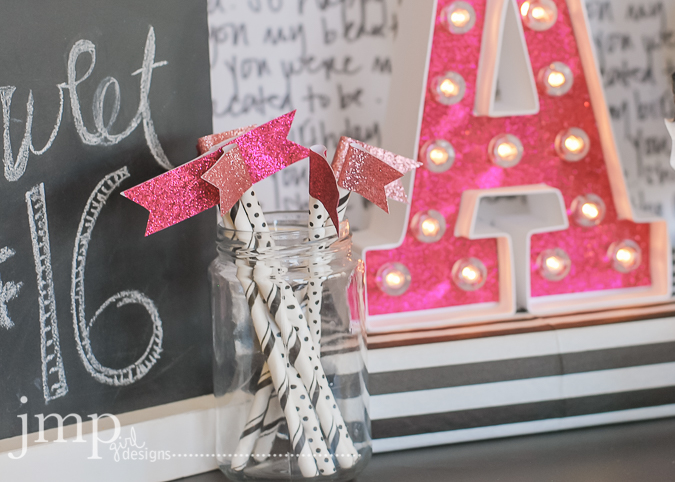
Party sticks. What's a celebration without little festive party sticks? For these simple decorations, I used Marquee Love Glitter Tape. The 1-inch wide tape was wrapped around a lollipop stick, and then notched at the end. A 5-minute diy and not expensive embellishment.

Sweet Sixteen Marquee Love | @jamiepate How to celebrate a meaningful birthday and decorate a party Heidi Swapp Marquee Love style


Just a few ways to take a Marquee Love letter all glittered up and use as a focal point for a birthday celebration.

Thank you so much for visiting and happy Thursday!!!

winner winner...

6.09.2015

Hey Jane Patterson...

You said:

This is awesome! Thanks for sharing!
You are the winner of my little giveaway!!!

If you could contact me at jmpgirl @ gmail . com and give me your email information, I will contact you and get you your goodies!!!

Thank you everyone for visiting and for those lovely comments!!!

anatomy of a memory planner ~ heidi swapp

6.04.2015

Ah...
did you catch that collective sigh?
What a month May was.
As I was closing out the month in my planner, it dawned on my I have yet to share my memory planner for 2015 here with my sweet followers. There was a nice request on instagram to share some of my approach to the Heidi Swapp Memory Planner. Today I will expound a bit on my process, but be warned...it may change up next month.


Currently I am using three planners. One is a daily spiritual journal. This is the first year I have approached my daily meditative and prayer time in a planner like this. But that is for another post. Then I am embracing a design planner. A planner just for my assignments, class planning, as well as places to put down dreams and hopes for my creative life.

But the main planner to my life is the black and white Heidi Swapp Memory Planner 2015.


Allow me to take you on a little tour:


1. The front pockets are great for holding those little things. Tags and post it notes are found here. Also the DailyPrompts from Heidi's Capture 30 stays here all the time. A Clear Sticker  decorates this part of the front  cover.

2. Inside the larger flap I keep a few things. Currently I have a sweet card from a friend as well as the Washi Shapes Book.


3. You will notice I have all the tabs for the rest of the year behind May. I do not keep previous months in my planner. I pull those out and have a separate album I keep them. But I do keep my future calendar pages.


4. The 'dashboard' as I think it is called, is actually a sheet of plastic Bazzill paper (not currently available). I cut this a bit larger than the first calendar tab page. This way the tab will not get stuck under the front pocket as mine kept trying to do. I also got a little artsy and added the 'love it' art screen from the Forever and Ever Screen Kit with Gold Screen Print Ink. It's one of my fav parts of my planner.


5. Turn the May tab page and there is, as you already know, the 'photo' page. For right now I have kept this very very simple and just followed the prompt of the page. Often I find myself placing a memorable photo from the previous month in that space so that I can enjoy it as I move along. That pic of Jen (createoften by Jen Evans) took place in April. But since this is a 'memory' planner, I love that it greets me like this in May.


6. This space in my planner always holds a pocket protector. For May I used a 4x6 pocket and placed my son's graduation invitation in that space. Makes me happy.


7. I always create a little cluster of embellishments on this part of the page. Just a little way I really customize my planer. I just like that it pokes through to the me from under the pockets.


8. The 3x3 pocket protectors come standard with the planner. And again, I always use them. Here I have a piece of pattern paper and an unfoiled Minc chipboard embellishment. The bottom pocket holds my daily 'fly' list. This is my daily (should) do list. If I hit all these things in a mornings time then I feel like all that. ha!


9. Now to the calendar page. I have to admit...it took me a little while to grow into this page. Back in the day I used a planner all the time. I fell away from it (and I don't suggest doing that). So when Heidi changed up the Memory Planner concept this year, I was sort of wandering for a little while. This page mostly takes the place of the calendar page from last year's memory planner (see those posts here) . But I use it a tad more as a planner to actually plot my events as well as family events on this page. Some days there is just nothing to place there, and then I add a puffy sticker (10), a stamp (11), or just leave it empty.


12. The week at a glance pages are the heart of my planner. For many people these pages are really the memory part for them with lots of photos and journaling. Up to this point, I have used these pages for daily to do lists, daily schedule, and other little things that need to be remembered. This space is really a work horse for me. But I also add to the pretty too. Because, life has GOT to be pretty wherever we can make it.

13. One way to add to the pretty is to take pattern paper and trim to 3x2-inches and hold it in place with washi. Keeps my words a bit more private if need be too.

14. Very often I just pen in lists of stuff to do. This is why my planner is open all the time on my desk. It's my brain. It's my go to all day long.

15. And then sometimes I will add a photo that captures the day. (as I go forward in June, I am finding that adding a photo more often is my way for the summer.)

16. Another pretty idea is to add a 2x2 Foil card when I want to remember a quote that spurs me on in my day. I write my quote right on top and then washi the card to the page so I can write even more under the flap.


17. Some days there will be no to do list. This was mother's day. I added my photo with my kids, and then some tags and flags to make it pretty. A real simple and flat way to give the planner some love.

18. I created a vellum envelope to place some of my Mother's Day cards and keep them in my planner. These will be such treasures to me next year when I go back and look.


19. The 3x3 Foil Cards are too big for the 3x2 space on the week at a glance page. Here I placed it at the top edge and it still fits the width of the space found there. I needed to be reminded to smile this week. It was a crazy week on many levels. Make your planner work for you. Put it to remind and inspire you of the light and good that needs to shine from your own self. I have a whole theory on this....again, probably another post.

20. Now some days are not about the to do list. Lots was going on here during graduation weekend but that to-do list was kept elsewhere and I  made space for just memory. These were big days in our family's life. The to do list won't matter. These images, however, will.

Twenty ways around my MemoryPlanner. Not inclusive. It is always changing. And there are plenty more ideas and ways to keep an album organized. If you made it this far you should be congratulated. Please leave a comment and I will enter you in a drawing for a little package give away. And I will be sure to continue this journey with you and share my pages as the year continues.

Blesssings...