time for some getaway

9.29.2012

jmpgirl ~ lets go mini
this was suppose to post over the weekend.
it would helped if i would have actually scheduled it.
i am home now...
and playing some serious catch up...

jmpgirl ~ lets go mini

jmpgirl ~ lets go mini

made the beginnings of a scrapbook on the road mini.
filled it with plenty of papers to journal and add photos to.
and now i am off making memories to do just that.

hope you have had a fabulous weekend.
be back soon.


spooky spark

9.28.2012

The fabulous Margie is at it again...

http://margieromney-aslett.typepad.com/.a/6a00d83451de1069e2017744b6e868970d-pi


She is showing us her Spooky~Spark style by way of a new video class, SpookySpark, beginning October first.

Now, we all know I am just not the halloweeney-type...
but I have learned so much from her and her Spark classes that this one is sure to only add to my creative love.

She is intensely amazing with the handmade and adds amazing depth and love to your home or gift giving, or party throwing.

Many more details on her blog.

Go check it out...if you dare!

amethyst? seriously?

9.27.2012

So rumor has it...
that there is a love/hate relationship over mists.
You know...the colored and pearly mists that you see all over...

HeidiSwapp has completely bought the farm, however, with her ColorShine.
And she talks about it over on her blog today...so I will let you go check that out for yourself.
(eta:: ColorShine giveaway on Heidi's blog today!!!)

That said, I gave myself a little personal challenge.
And here it is:
use the Amethyst.
Yes.
that's right.
the purple one.

Did you know I have a severe aversion to anything remotely related to purple?

Well, it is indeed true.

So...when avoiding an issue, face it head on...that's what I always say.


Taking the idea of one of Heidi's card creations from a recent Color Magic class, I went to work to make play with the Amethyst.

And here is the result...
and I have to admit...I am a bit giddy about it.

jmpgirl ~ amethyst?


 Using one of the patterns from the Color Magic 12x12 paper, I sprayed on a bit of the Tinsel and then the rest with the Amethyst Color Shine.
I warn you...go easy unless you want an amazing shock of color. The hues are intense. Gorgeously intense, I might add...
but I wanted to go a bit more subtle. So I went easy at first adding a little bit until I was happy with the result.

jmpgirl ~ amethyst?

The card was folded over into a matchbook style card.
I trimmed a few patterns from the VintageChic pattern paper as they complemented the colors I was working to use as side banners.

Then I realized that part of the map pattern in the NoLimitsDestination paper had some purple in the mix. I punched it with my MarthaStewart starburst punch....

and THEN...I realized that the striped butterfly in the VintageChicBuzzWords would totally work against the Amethyst.

jmpgirl ~ amethyst?


But before I added the butterfly (cute as it was), I went to dying white seam binding with the Amethyst...again, going easy. One hint I might add is to spray the seam binding with some water first. It helps to work the color into the fabric. But the results??? Gorgeous...I mean giddy gorgeous...(well, it was after midnight when I was working on this...but the color really was gorgeous.)

Put it all together...and I am ever so proud of myself for trying a new hue...and that it even turned out fairly likeable.

Now go...
go create with something you have avoided.
(and don't forget the giveaway!)

31 Days of Halloween

9.26.2012


Rhonna is like the queen...of everything.
Even Halloween.
Constantly I am telling her she even makes Halloween purdy.

I, on the other hand, am not the halloweeney type...
blame it on up bringing perhaps...

That said...I adore Rhonna, and she is celebrating the countdown to her birthday in grand and gorgeous style once again.

I invite you to follow her this week and into next month as the CreativeTeam celebrates with her.

Already we have seen the likes of Spooky Teacups...


And gorgeous over the top wreaths by CreativeTeam member Amy Miles...


 And today she shares Idea No. 3...


decoupaged plates by Heather Thoming.

All these projects use Rhonna's Spooky Junque kits from last years release...
in conjunction with this year's Spooky kits collection.
They both work into each other beautifully...
and they are both still bundled for an amazing savings...you might even say a spooky savings.

I adore the Spooky Junque...
and although I don't do halloween over the top...
i will still be showing off how I use these kits and how i use them to celebrate fall and many other celebrations in our home this season.
but that is for next week...

now go...
make this time of year purdy in your home.


fun & new opportunities

9.25.2012

jmpgirl ~ fun&new opportunities
remember last week i was talking of goal setting. dreaming. & planning?
i am smack in the middle of several dreams and goals coming true.
one of them is this wee opportunity to create at home and have those creations available for purchase.

my lady Eve is donning one of those items...a book paper flower garland.

jmpgirl ~ fun&new opportunities
included are several stemmed paper flowers. coffee filter wreaths.

jmpgirl ~ fun&new opportunities
more coffee filter flowers. distressed frames and paper bouquets. pretty vintage sewing pattern poms. light. airy. and bling sweetly peeking out from the middle. my new secret favs.

jmpgirl ~ fun&new opportunities

my friend Bonnie...of Bonne'Bella...has asked me to add some of these creations to her new boutique at The Emporium in Castle Rock.
this past saturday enabled me to join her under the vintage canopied tent at Eve's Soiree'.

the middle photo is courtesy of Bonnie.
it is a fun and exciting time.
meeting new and very interesting people.
finding the heart of the love of handmade here in this little city.

jmpgirl ~ fun&new opportunities
Eve'sRevolution is an ever so sweet retail and select consignment shop in Old Colorado.
if you are local, you really need to go for a visit.
sweet as ever.

so what am i learning???
one never knows where one's creativity will take them.
one needs to think bigger.
one needs to be ready for anything.

blessings + gratitude

9.20.2012

If you visit here even a little bit, you know I have this thing about gratitude.
Today is taking that thought into a little bit different direction.
Today I share my project that is also posted over at heidiswapp.com.
Today I warn you...high photo volume...with a bonus tutorial at the end.


jmpgirl ~ blessings+gratitude

It pleases me to share with you a mini album based on the theme of gratitude.
A few of the team members were challenged with creating a project based on gratitude.
Heidi has a digital kit available soon that includes beautiful cutting files with all sorts of words that lend themselves to the blessings and gratitude theme.

jmpgirl ~ blessings+gratitude

The 
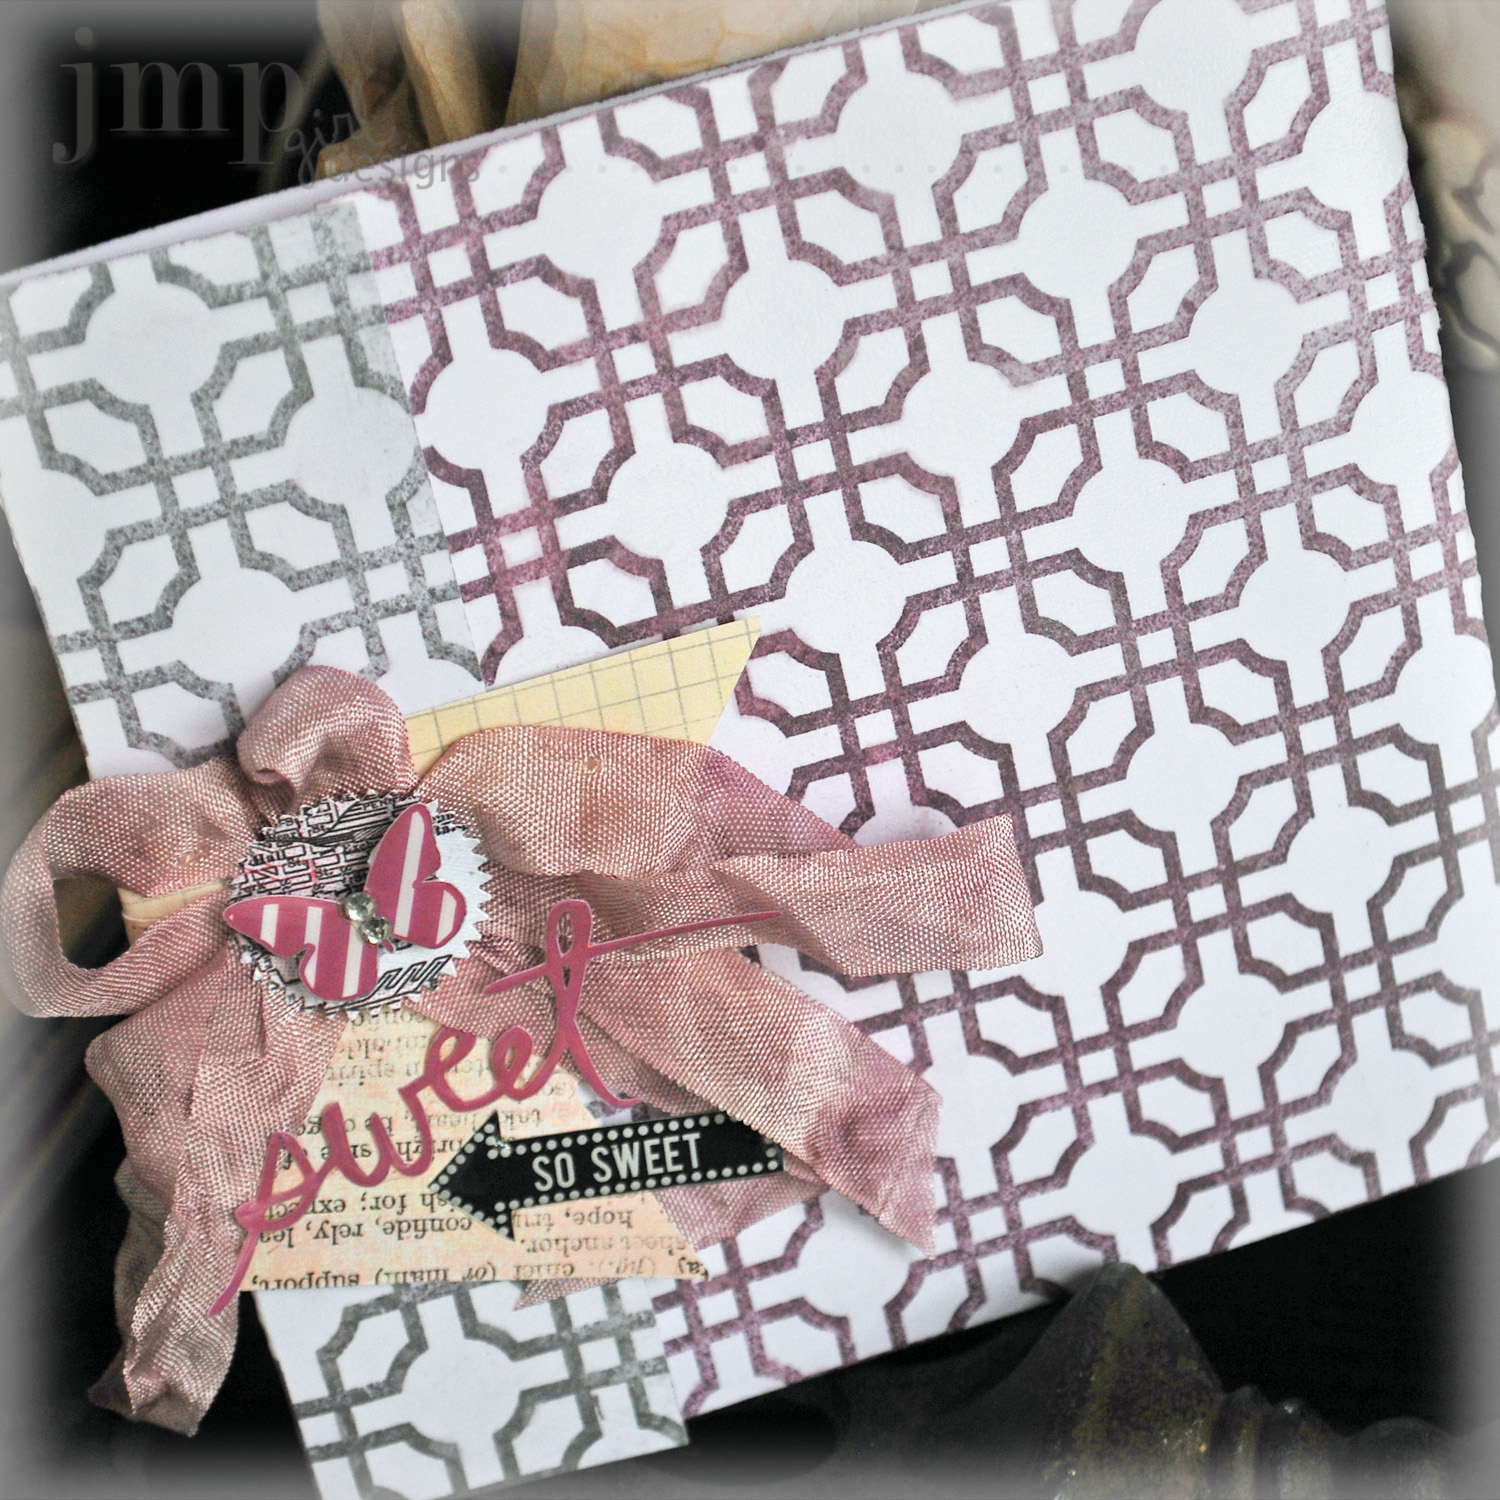
Vintage Chic collection came in handy once again. Love this line. It should be shipping to online stores and local scrapbook sources even as I write this. I wanted to stay with the yellow/gold theme with pops of the teal.

jmpgirl ~ blessings+gratitude

This mini album is chock full of pockets and journal cards and tags and places to write lots of thoughts and feelings on this theme of gratitude. I cut many of the words out on my Cameo on white cardstock and then misted them each.


jmpgirl ~ blessings+gratitude
my kiddos + cousins. quite a clan.

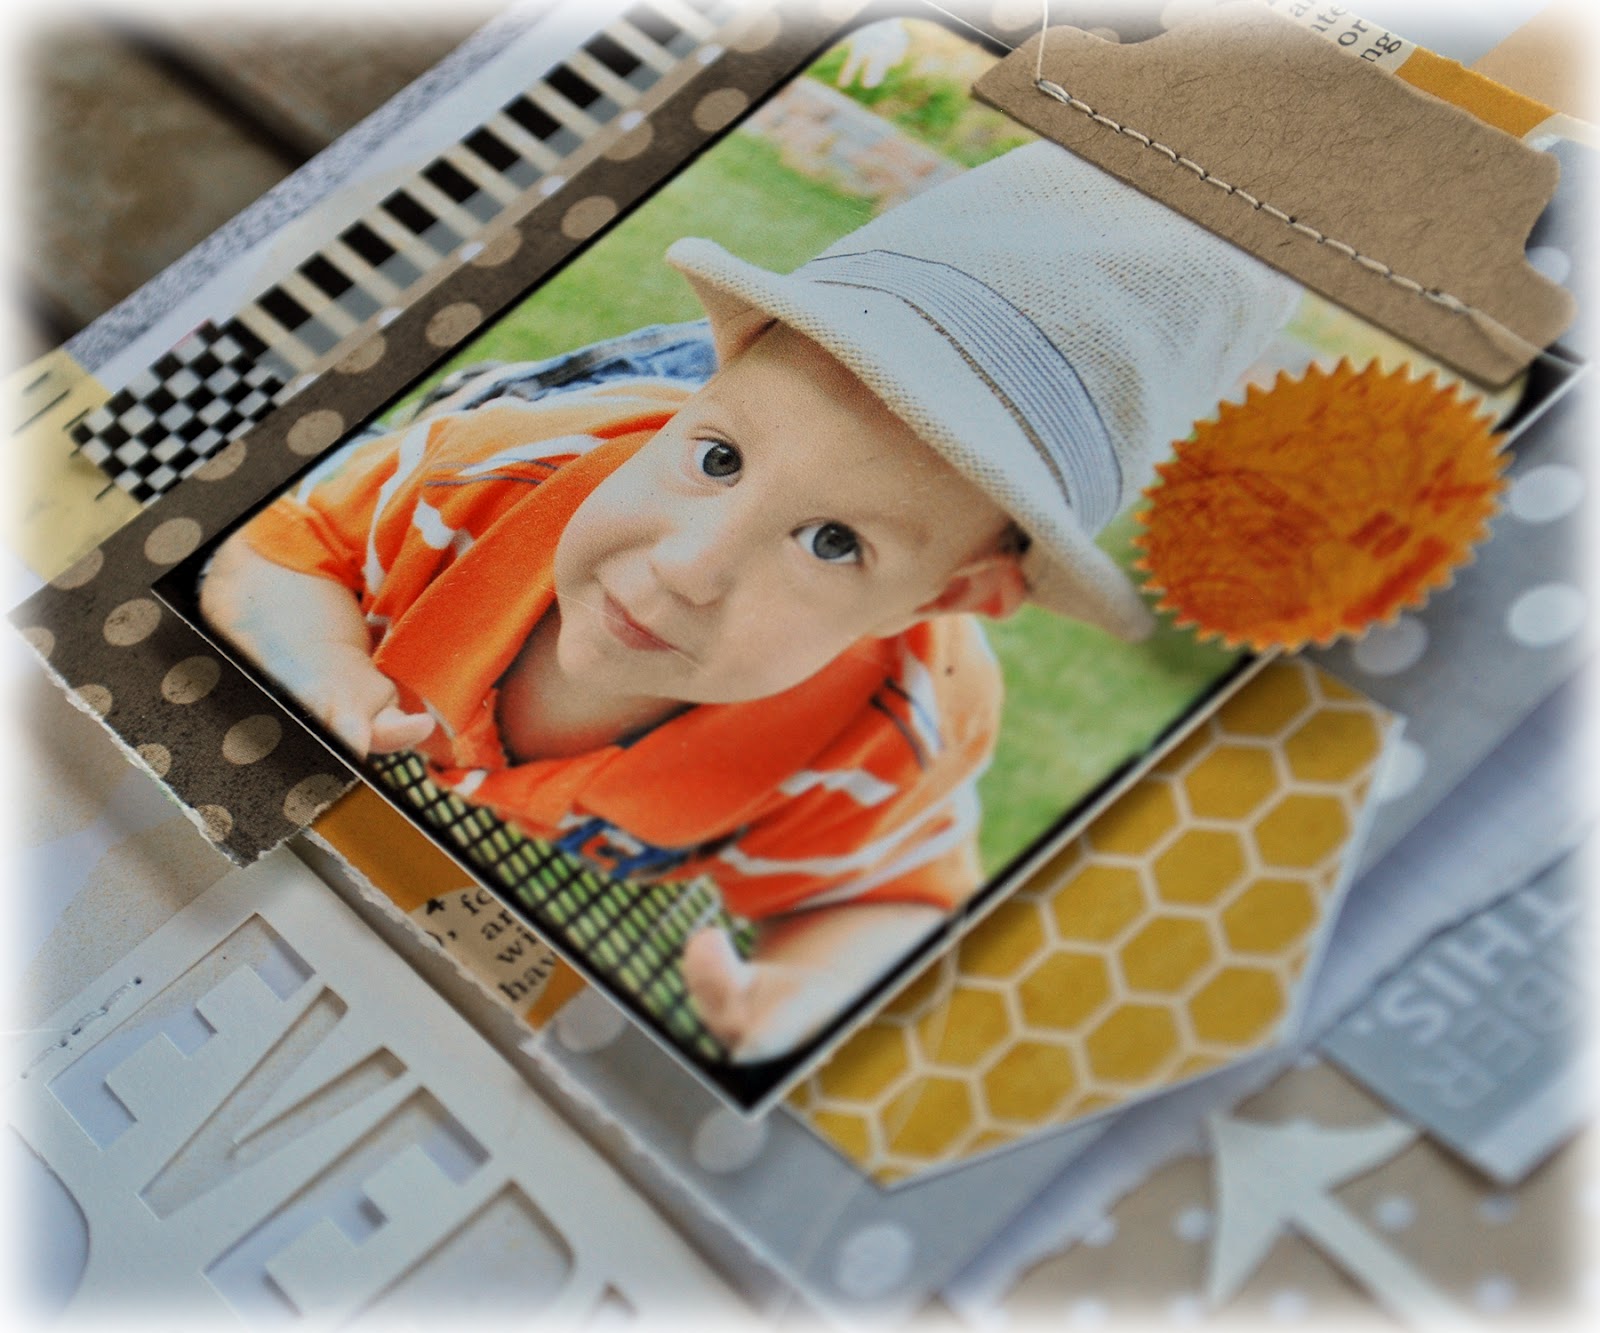
The opportunity for the little mr.'s 2nd birthday is what prompted this album. Although an occasion like a child's birthday might seem everyday, it caused me to pause and take a deeper look at the photos taken, and let them lead me in a story of being thankful for this event, for these people, for the little moments that are as fleeting as he is getting big.

jmpgirl ~ blessings+gratitude

There is more detail on Heidi's blog about what I used where. Like the quotes she created that I printed on the VintageChicNotes and tucked away in the pockets.


jmpgirl ~ blessings+gratitude
plenty of room on other side of tag for additional journaling.

Ah...to have this thought always at the center of my mind would in itself be a gift.


jmpgirl ~ blessings+gratitude
included on every mini layout are the sentiment or definition stickers, or both.

I took time to be thankful for our food.
For the fact we had plenty to share with our extended family.
That there was even left overs.
That we always have enough.

jmpgirl ~ blessings+gratitude


jmpgirl ~ blessings+gratitude
notice the photo has a tag sewed on it...

I was happy to have these sweet moments captured that were shared between my mom and my baby.


jmpgirl ~ blessings+gratitude
it opens with another photo underneath.

Priceless. It looks as though he is totally taking in what she is sharing with him.

jmpgirl ~ blessings+gratitude
Had great fun with these vellum pockets, and share how they were put together below.

jmpgirl ~ blessings+gratitude

There are interactive photo flip books included.

jmpgirl ~ blessings+gratitude

A peek inside.

jmpgirl ~ blessings+gratitude

There is celebrating my oldest daughter's love to bake...
and how she baked these raspberry cupcakes with buttercream frosting so heavenly.

jmpgirl ~ blessings+gratitude

There is of course the star of the show...

jmpgirl ~ blessings+gratitude

...and though little...he brings abundant joy to our lives.

jmpgirl ~ blessings+gratitude

There is also remembering to capture these older ones...


jmpgirl ~ blessings+gratitude

as they will not always be with us and I remember that my older ones and their cousins were once 2 years old...sigh...

So much to take in here today...
the gratitude theme...
the mini album with plenty of room for lots of stories and quotes...
the gorgeous cutting files soon available in Heidi's shop...
and the event of a little guys birthday, and how so many blessings can be rendered from such an event.

Now for the vellum pocket tutorial::
1. Supplies: you will need ::     piece of vellum. 6x4 piece of pattern paper. sewing machine or glue.
2. Trim vellum to 2 pieces measuring 6x4.
3. Cut out a rectangle from the center of the 6x4 pattern paper leaving about a fourth inch frame.
4. Layer the 2 pieces of vellum together with the pattern paper frame on top.
Then sew around the three edges. (You can also glue this if you prefer), and fill with confetti, sequins, journaling tags, words, photos...you get the idea. (Heidi would be so proud that I sewed this.)

If you made it to here you are an amazing reader!
Thank you so much.
Now go...celebrate gratitude.

stay creative

9.18.2012

As I shared yesterday, it is essential to write down your goals.
Specifically your creative goals.
Essential for growth.
Essential for that creative muscle to grow.
Essential for your personal ability to inspire and create.

A way I stay in the mix is by taking classes here and there.
Especially classes that peak my interest or when someone I admire is leading the class.
I always gain something from an online class.
Pop Off the Page by Studio Calico with Jen Jockisch has been no exception.

It's not because I don't know how to compose a photo layout.
It's not because I don't know how to play with paper and make it work.
It's not because I don't have any ideas.
It's because I want to stay fresh. current. and continue to establish my style.

This class has accomplished all that for me just as I had hoped. (hmm...a little goal setting happening)
PLUS...it has reminded me how how much I really do love the traditional scrapbook page.
I do not do them as often as I have in the past for many reasons.
But I really do love the process.

I shared a little peak of a card I made for this class yesterday...

here is the rest::

jmpgirl ~ stay creative

This was from Lesson1.
We were challenged to lift one of the contributors and I chose Danielle Flanders.
This card utilizes a few techniques shared in the class.
This card shares a sentiment from yesterday's post that is vital to me right now.
This card was designed to share with a friend who I think may need it right now.
This card was made with Vintage Chic scraps left over on my table making a project for HeidiSwapp that will be published tomorrow.

I have to share one other...do you mind?

jmpgirl ~ stay creative

This was also from Lesson1.
An exercise in layers and textures. Plus misting and stenciling.
It's not totally my style, but that is just the point, practicing an idea outside of my personal zone.
Love these sorts of exercises.

jmpgirl ~ stay creative

Can you stand that sweet face?

jmpgirl ~ stay creative

Now go...try something outside of your zone today.
and enjoy.

create every day

9.17.2012


rhonna designs ~ create something every day 


Very often another's creative words on their blog will jump out and scream themselves at me... and here was one that was no exception...

except this was not a blog post...
Rhonna sends out newsletters very often, and during the One Year Birthday celebration of the shop, she sent them out daily.
And they were not to be missed.

With permission I asked if I could share some of her words here...
because they spoke to me about where I am right now in my creative world.

This particular newsletter was titled Create Something Everyday. And she focused on her 100 Creativity Exercises that she uses ALL. THE. TIME.

One of the points she focused on that really spoke volumes to me was this one::  

GOALS:: Write out creative goals for 1 day. 1 week. 1 month. 1 year.

here are her words...
8. GOALS:: Write out creative goals for 1 day. 1 week. 1 month. 1 year.

This is a powerful exercise. Write these down in a special book so you can look at them to be inspired, motivated & encouraged. This can be something that will take you into a whole new realm of creativity that you could never imagine. For instance, many of you know that a little over a year ago I became very ill. I had to step back from everything creative that I was doing. It broke my heart, but I knew I couldn't continue doing what I was doing. I still did my creativity exercises...even lying in bed. And one day I picked this one out of my jar. It sparked me inside. I sat down & made goals.

1 day:: to be able to get out of bed & overcome this illness.

1 week:: start designing again....even if it's just on my blog.

1 month:: put up my designs for sale on my blog.

1 year:: open up my online store to share my designs & uplift & inspire.

You know the rest of the story....each of those goals helped me, encouraged me...& I feel more creative than I ever had. I could have chosen to wallow in my bed & say 'I just can't do it'...Don't get me wrong. It's been a long, difficult, roller-coaster of a year....but, I've learned so much & I'm so thankful for that obstacle & trial, because I think it was a blessing in disguise. Goal setting is essential for creative growth. (copied with permission sept2012)


jmpgirl ~ create every day
card created for Pop Off the Page. StudioCalico. supplies: VintageChic by HeidiSwapp


Goal setting IS essential for creative growth.
Goals accomplished bring with them more energy and more confidence and more creativity.
Goal setting AND accomplishing are what I am in the middle of experiencing right now. So excited for what is on my horizon. Goals only dreamed and now slowly becoming realized. The excitement is indeed uplifting and inspiring.


And I truly hope. desire.  & want for you, my creative friends, too experience dreaming.  to experience goal setting. to experience goal accomplishing. The possibilities are endless. And the world needs what you have to share.

Now go...write down those goals.
And most especially in a pretty book that YOU created.

insta summer

9.12.2012

This week on Heidi's blog the MediaTeam is sharing Instagram inspiration. Each project so far has been very unique. Hope you get a chance to read about them all.

jmpgirl ~ insta summer

The idea of pretty paper AND instagram...love them each separately, love them together.
With my project I stayed with a traditional 12x12 layout that includes an interactive mini book.
This is a great project to have out on an easel and already find that my kids enjoy looking at the pages often.

jmpgirl ~ insta summer

I mimicked the larger photo spread in this little pop of picture at the top of the layout.

jmpgirl ~ insta summer

The teal color from the Adore pattern was the inspiration starter for this layout. It evokes the color of the pool, which is the story here...our days at the pool all summer long. Then I took a piece of the ColorMagic paper and matched a couple of different mists up to match the Adore. Love a tone on tone feel.

jmpgirl ~ insta summer

Because summer is such a festive and fun time for us here, I used lots of colors and banners to celebrate that theme.  The MiniInstaFrames came in perfect use there on the left side of the page...I could use those over and over again.

jmpgirl ~ insta summer


jmpgirl ~ insta summer

Even though this was a summery spread, the black pattern gives great foundation to the colorful pages and really allows the fun embellishments + the photos to shine as they should. This was one of those projects that started to create itself. Love to find that zone and just move with it. So satisfying, and love how it worked it's way through this layout and mini.

jmpgirl ~ insta summer

This sums it all up...lazy, loungey days around the pool. What a fabulous summer we had!

jmpgirl ~ insta summer

This is me soaking up every ounce of sun, because I know fall is coming...and I will miss this.

jmpgirl ~ insta summer

I loved using the BuzzWords on each of these mini pages. I always find something thematic to tie my pages together. In this instance, it was the BuzzWords that made their way on each page.

jmpgirl ~ insta summer

Not only do I hope you had a fabulous summer, but I hope you found a special way to celebrate the season as well through words and pictures. An interactive 12x12 layout of Instagram memories makes a great way to share those special days.

oh...would love for you to follow me @jamiepate

Now go...celebrate memories.